

Need to move data from Word to Excel?
It can be simple if your Word file already has a table. But if the file has messy text, merged cells, or extra line breaks, the result can get broken after pasting.
Don’t worry.
In this guide, I’ll show you the easiest ways to convert a Word document to Excel, keep the structure as clean as possible, and avoid common issues like split cells and broken formatting.
Key Takeaways
- The easiest way to convert a Word document to Excel is to copy the table from Word and paste it into Excel.
- If your Word file is not formatted as a table, you may need to clean the content first before moving it to Excel.
- You can preserve some formatting, but Word and Excel do not use the exact same formatting system.
- If cells split after pasting, extra line breaks or inconsistent table structure are usually the reason.
- For repeated tasks, automation is possible, but it works best with structured documents and templates.
How to Convert a Word Document to Excel
If your Word document already contains a proper table, this is the fastest method to use.
Steps:
- Open the Word document
- Select the table or content
- Copy the selected data
- Open Excel
- Click the destination cell
- Paste the data
- Review the result
Step 1: Open the Word Document
Open the Word file that contains the data you want to move to Excel.
If the document has multiple sections, scroll to the exact table or content block you want to convert.
Step 2: Select the Table or the Content
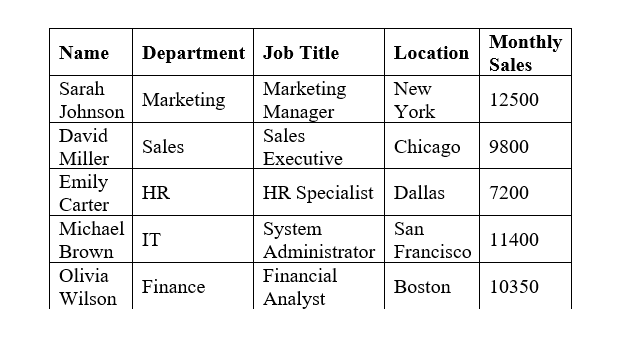
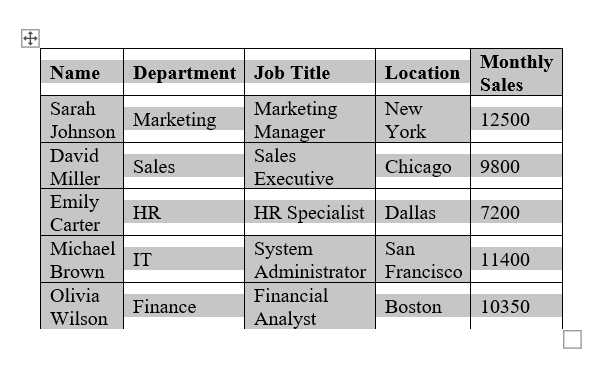
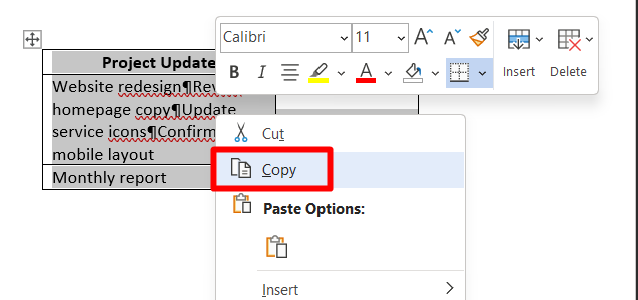
Click inside the Word table.
If it is a full table, use the table handle at the top-left corner to select the whole table. If you only need part of it, drag your cursor over the exact rows and columns you want.
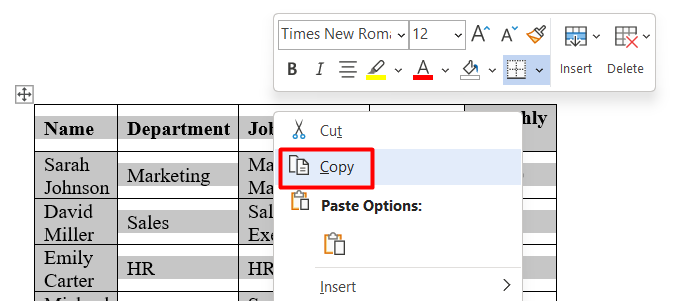
Step 3: Copy the Selected Data
Once the content is selected, press Ctrl + C on your keyboard.
You can also right-click and choose Copy.
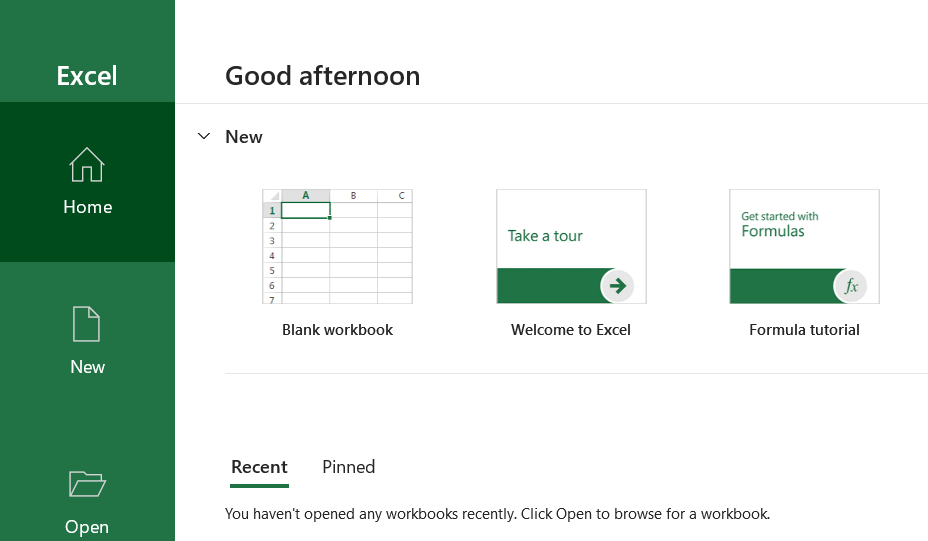
Step 4: Open Excel
Now open Microsoft Excel and create a new blank workbook, or open an existing workbook where you want to place the data.
Step 5: Click the Destination Cell
Click the cell where you want the Word data to begin.
Usually, this will be A1, unless you want to place the imported data somewhere else.
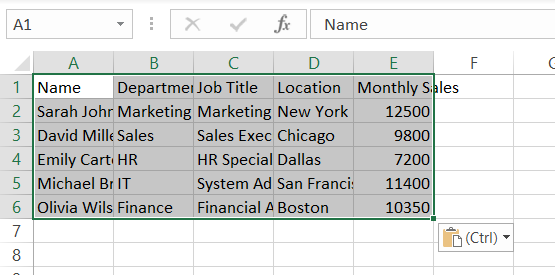
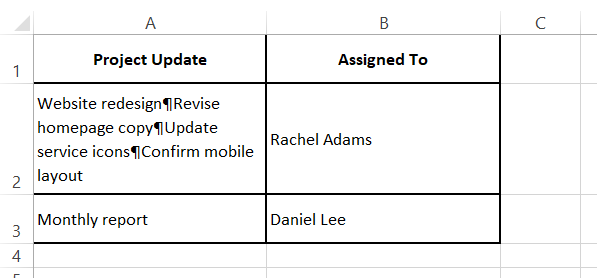
Step 6: Paste the Data
Press Ctrl + V to paste the content into Excel.
If the Word table is clean, Excel will usually place the data into rows and columns automatically.
Step 7: Review the Result
After pasting, check whether:
- Each row appears in the correct row
- Each column appears in the correct column
- No text has shifted into the wrong cell
- No extra blank rows were created
If everything looks fine, your conversion is done.
That’s it.
📖 You May Also Like This “MS Excel” Article: How to Use XLOOKUP in Excel (Step-by-Step Guide)
How to Convert Word to Excel Without Losing Formatting
Let’s be honest here.
You can keep some formatting, but you usually cannot keep all formatting exactly the same. Word is a document editor, while Excel is a spreadsheet tool. So some layout changes are normal.
Still, here is the best way to keep the structure as close as possible.
Steps:
- Open the Word file
- Copy the table only
- Paste it into Excel
- Try paste options
- Adjust columns, row height, and text wrapping
- Fix any broken formatting manually
Step 1: Open the Word File
Open the document and locate the section you want to move.
If possible, only work with the clean table area, not the surrounding paragraphs, headings, or extra notes.
Step 2: Copy the Table Only
Select only the table.
Do not include extra text above or below the table unless you really need it. This gives you a better chance of keeping the layout clean inside Excel.

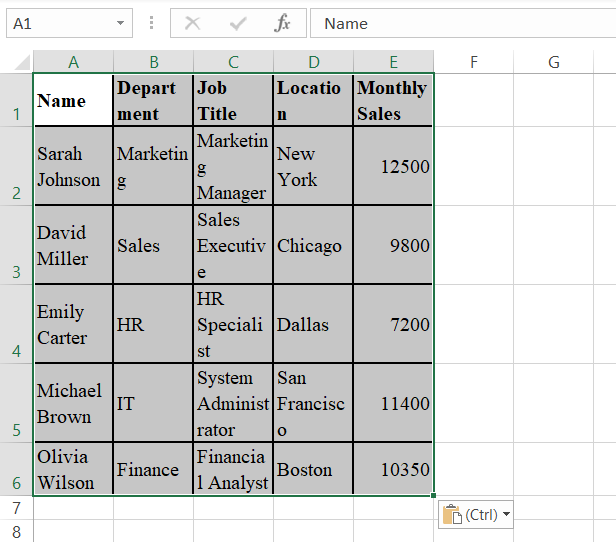
Step 3: Paste It Into Excel
Open Excel and paste the table into a blank area.
In many cases, Excel will preserve the basic structure immediately after pasting.
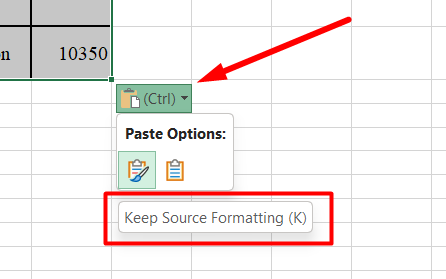
Step 4: Try Paste Options
After pasting, click the small Paste Options button if Excel shows it.
You may see options like “Keep Source Formatting (K)” or matching the destination formatting. Test the available option that gives you the cleanest result.
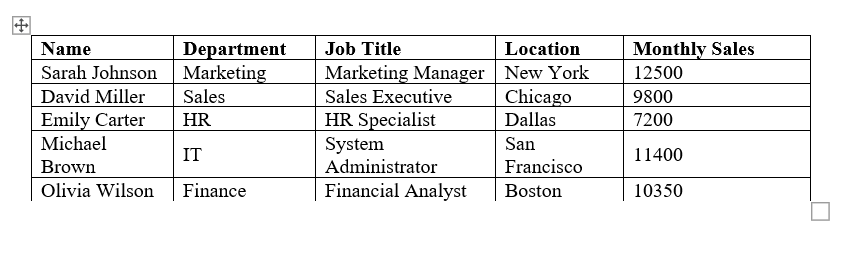
Step 5: Adjust Columns, Row Height, and Text Wrapping
Even when the paste works, the content may still look cramped or uneven.
To improve the result:
- Widen narrow columns
- Increase row height if needed
- Turn on Wrap Text for longer content
- Adjust alignment if text looks off
Step 6: Fix Any Broken Formatting Manually
This part is normal.
You may need to fix:
- borders
- bold text
- font sizes
- cell alignment
- merged-looking areas that did not transfer well
So, if your goal is perfect visual matching, that usually won’t happen. But if your goal is to keep the data usable and close in appearance, this method works well.
How to Convert a Word Table to Excel
If your content is already inside a proper Word table, this is the most reliable way to move it.
Steps:
- Open the Word table
- Check whether the table is clean
- Select the full table
- Copy the table
- Paste it into Excel
- Confirm the rows and columns
Step 1: Open the Word Table
Go to the page in Word where the table appears.
Click anywhere inside the table to make sure you are working with the correct data block.
Step 2: Check Whether the Table Is Clean
Before copying, quickly look for obvious issues such as:
- extra blank lines inside cells
- inconsistent row sizes
- manually typed spaces used for alignment
- mixed content that should be in separate columns
These issues can cause problems after pasting into Excel.
Step 3: Select the Full Table
Use the table handle or drag across the whole table to select every row and column you want to transfer.
Step 4: Copy the Table
Press Ctrl + C.
You can also right-click the selected table and click Copy.
Step 5: Paste It Into Excel
Open Excel, click the starting cell, and paste the table.
If the table was built properly in Word, Excel should place the data into separate cells without much trouble.
Step 6: Confirm the Rows and Columns
Now check the result carefully.
Make sure:
- Each Word row became an Excel row
- Each Word column became an Excel column
- No content was pushed into random cells
- long text still appears in the correct place
If everything looks correct, the conversion worked successfully.
How to Transfer Data From Word to Excel Automatically
If you only need to do this once, manual copy-paste is usually faster.
But if you do this again and again, you may want a more automatic option.
There are two practical ways to think about automation here:
- semi-automatic transfer
- true workflow automation
Method 1: Semi-Automatic Transfer Using Structured Tables
This works best when the Word document always uses the same table format.
Steps:
- Create a consistent Word table structure
- Keep the same columns in every document
- Copy and paste the data into Excel each time
- Clean only small issues after pasting
This is not fully automatic, but it saves time because the format stays predictable.
Method 2: Use Automation Tools for Repeated Workflows
If this is a recurring business task, you can use tools like workflow automation platforms to move data between structured Word templates and Excel files.
This only works well when:
- The Word documents follow a fixed format
- The same fields appear in the same place every time
- Your Excel sheet is already structured to receive the data
If your Word files are random, messy, or different every time, automation will usually be unreliable.
So yes, automatic transfer is possible. But it is best for repeatable workflows, not for every normal Word document.
📖 You May Also Like This “MS Excel” Article: How to Create a Clustered Column Chart in Excel
How to Convert a Word Table to Excel Without Splitting Cells
If your Word table contains multiple lines inside the same cell, Excel may split that content into separate rows when you paste it.
To avoid that, you need to replace the paragraph breaks in Word with a temporary character first. Then, after pasting the table into Excel, you replace that temporary character with a line break again.
Don’t worry. I have broken it down into simple steps below.
Steps:
- Open the Word table
- Select the whole table
- Open the Find and Replace window in Word
- Replace paragraph marks with manual line breaks
- Copy the table
- Paste the table into Excel
- Open the Find and Replace window in Excel
- Replace the temporary character with a line break
Step 1: Open the Word Table
Open your Word document and go to the table you want to copy into Excel.
This method is useful when some cells contain multiple lines of text inside the same cell.
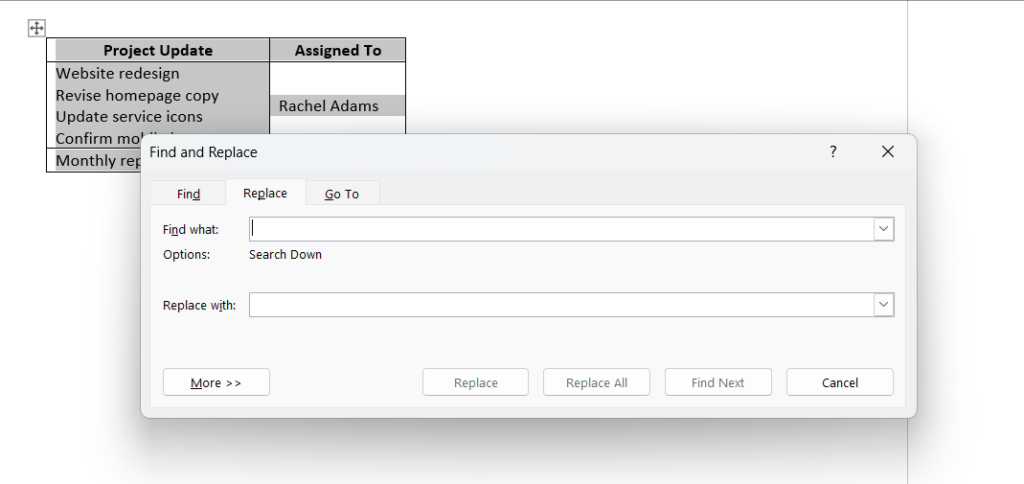
Step 2: Select the Whole Table
Select the full Word table before making any changes.
Make sure all the rows and columns you want to move into Excel are selected.
Step 3: Press Ctrl + H to Open the Find and Replace Window in Word
Now press Ctrl + H on your keyboard.
This will open the Find and Replace dialog box in Microsoft Word.
Step 4: Replace Paragraph Marks With Manual Line Breaks
Inside the Find what field, type ^p, and inside the Replace with field, type ^v
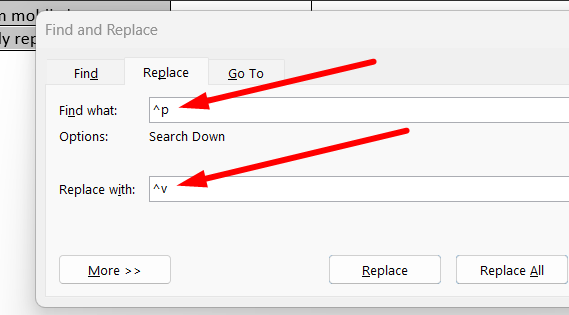
Then click Replace All.
After that, close the dialog window.
This step replaces paragraph breaks inside the selected table with manual line breaks, which are less likely to break the cells when pasted into Excel.

Step 5: Copy the Table
Now that the breaks have been replaced, copy the table by pressing Ctrl + C.
You can also right-click and choose Copy.
Step 6: Paste the Table Into Excel
Open Excel and click the cell where you want the table to begin.
Then press Ctrl + V to paste the table.
At this stage, the table should paste more cleanly without splitting the cells into extra rows.
Step 7: Press Ctrl + H to Open the Find and Replace Window in Excel
In Excel, press Ctrl + H to open the Find and Replace dialog box.
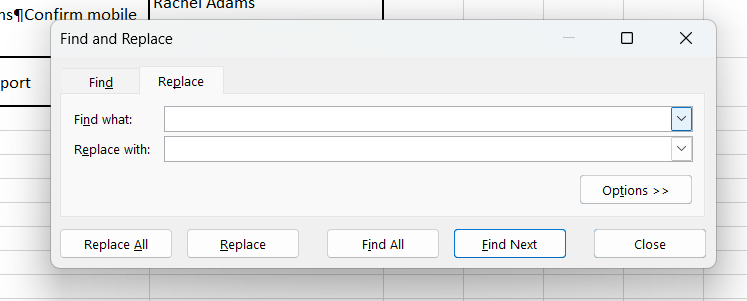
Step 8: Replace the Temporary Character With a Line Break
Now click inside the Find what field. Hold down the Alt key and, while holding it, type: 0182
This enters the paragraph symbol.
Next, click inside the Replace with field.
Again hold down the Alt key and, while holding it, type: 0010
You may not see anything appear in the field. That is normal because it is an invisible character.
Now click Replace All.
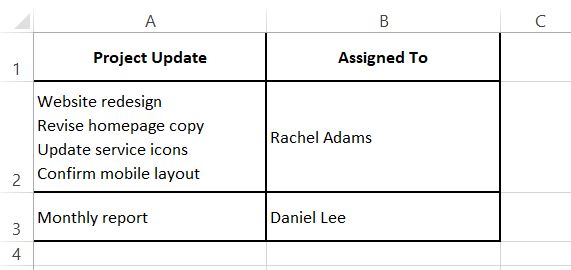
This will remove the temporary symbol and leave you with clean line breaks inside the Excel cells.
That’s it!
Common Problems When Converting Word to Excel
Here are the most common issues people run into:
The Data Pastes Into One Column
This usually means Excel cannot detect clear separators between values.
Fix:
- Use tabs between values
- Try Text to Columns
- Clean the Word content before pasting
Extra Rows Appear After Pasting
This usually happens because of extra line breaks inside Word table cells.
Fix:
- Remove unnecessary line breaks in Word
- Copy the table again
- Paste into a blank Excel sheet first for testing
Columns Become Misaligned
This often happens when the Word table has merged cells or inconsistent structure.
Fix:
- Make the Word table more uniform
- Avoid mixed layouts inside the same table
- Use a structured text import method instead
Formatting Looks Different
This is normal because Word and Excel use different formatting systems.
Fix:
- Use paste options
- Adjust column width and row height
- Apply manual formatting after pasting
Best Method to Use Based on Your File Type
Here is the easiest way to choose the right method.
If Your Word File Has a Clean Table
Use:
- Copy and paste directly into Excel
This is the fastest and easiest option.
If Your Word File Has Messy or Non-Table Content
Use:
- Clean the content first
- Separate values clearly
- Import or paste into Excel
- Use Text to Columns if needed
This gives you better control.
If You Need to Do This Repeatedly
Use:
- A standard Word template
- A structured Excel sheet
- An automation workflow if the format stays the same
This is best for recurring tasks.
Final Thoughts
The easiest way to convert a Word document to Excel is to copy the table from Word and paste it into Excel.
If the structure is clean, it usually works in seconds.
If the result breaks, the problem is usually not the paste itself. It is often extra line breaks, messy content, or inconsistent cells in the original Word file.
So, start with the simple copy-paste method first. If that does not work, clean the data and use a more structured import method.